
 listicle
Squat Rack Alternatives for Home Gyms (2026 Guide)
Table of Contents
- Why You Might Not Need a Full Power Rack
- Quick Comparison of Budget-Friendly Squat Rack Alternatives
- Squat Stands vs Power Racks: Which Fits Your Space?
- The Best Budget Rack Options Under $500
- DIY Squat Rack Ideas for the Practical Lifter
- How to Squat Safely Without a Rack
- Making Your Final Choice
- Conclusion
- Frequently Asked Questions
Last Updated: September 4, 2026
Why You Might Not Need a Full Power Rack
The average full power cage consumes nearly 50 square feet of floor space and costs as much as a used car. For many lifters, that investment in alternatives to expensive home gym squat racks makes little sense when you can build 90% of your squat strength for a fraction of the price.
A full power rack offers unmatched safety for heavy barbell training, but it demands serious space and budget. If you're lifting moderate loads, training in a rented apartment, or just starting out, the trade-off rarely works in your favor.
Squat rack alternatives fall into three broad categories: standalone squat stands, half racks, and DIY or rack-free training methods. Each solves a different problem, and each has genuine limitations you need to understand before buying.
Quick Comparison of Budget-Friendly Squat Rack Alternatives
The fastest way to narrow your options is to compare the core specs side by side. Below is a snapshot of the most practical squat rack alternatives for home use, based on equipment currently on the market.
| Option | Typical Price Range | Weight Capacity | Best For |
|---|---|---|---|
| Independent Squat Stands | Lowest | Lower | Minimalists, tight budgets |
| Half Racks | Low-Moderate | Moderate | Limited space, need safety arms |
| Budget Power Racks | Moderate | Moderate-High | Beginners wanting full safety |
| DIY Rack Solutions | Lowest | Variable | Practical lifters, weekend projects |
| Rack-Free Training | Free | N/A | Apartment dwellers, technique work |
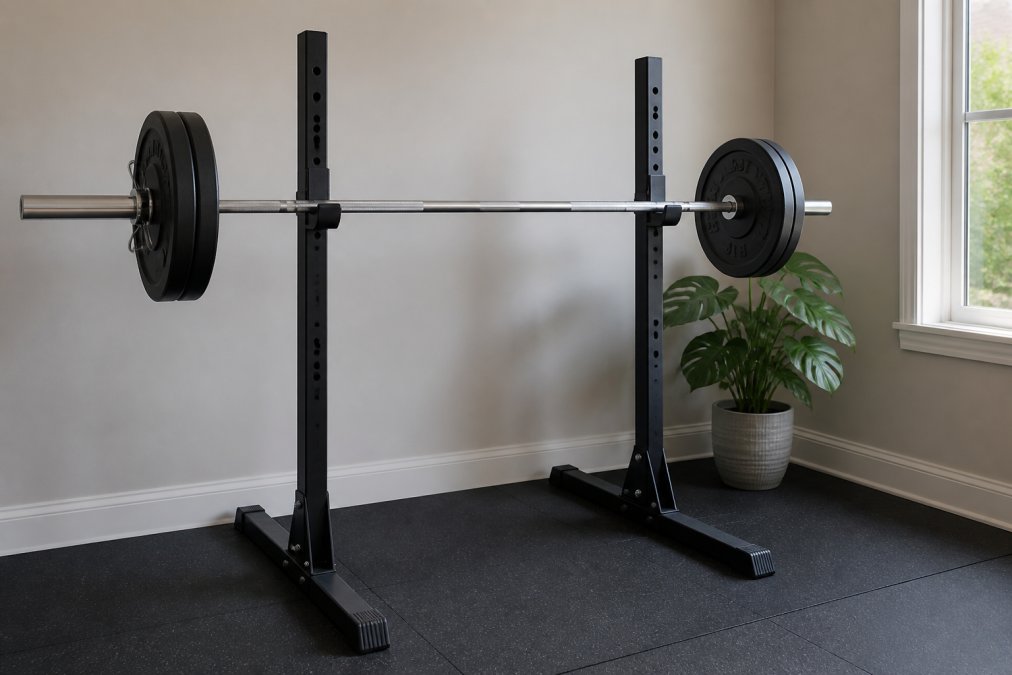
Independent stands are the most affordable and portable option, but they lack the safety features of a cage. Half racks split the difference, offering safety spotter arms in a compact vertical design. And if you train without a rack entirely, your only cost is a quality barbell and some weight plates.
Squat Stands vs Power Racks: Which Fits Your Space?
Squat stands vs power racks comes down to one question: how much weight do you lift, and how much room do you have?
Independent squat stands are the clear winner for apartment dwellers and lifters with under 25 square feet of dedicated space. They break down easily, slide under a bed, and cost significantly less than any full cage. The trade-off is that they offer no catch points if you fail a rep.
Power racks provide the gold standard for safety with adjustable J-cups and safety pins that catch a failed lift. But they require substantial floor space and vertical clearance, typically 7 feet or more of ceiling height. A half rack like the MIKOLO HR05 offers a middle path: safety arms with a smaller footprint than a full power cage. According to general home gym setup guidance from the American Council on Exercise, measuring your space before purchasing equipment is the single most important step in building a functional training area.
The Best Budget Rack Options Under $500
If you've decided a rack is worth the investment, several solid options stay under the $500 mark without sacrificing structural integrity.
The REP Fitness PR-1100 Power Rack is among the most popular budget entries, featuring a 700 lb weight capacity, a pull-up bar, and J-cups included. Its compact footprint suits smaller spaces, and it sells for around $349.99. The main limitation is a lower weight capacity than commercial-grade racks, but for most garage gym lifters, 700 lbs is more than sufficient.
The Titan Fitness T-3 Series Power Rack offers 2x3 inch steel uprights with J-hooks and safety spotter bars at roughly $500. It's compatible with many Titan attachments, making it a smart buy if you plan to expand your setup later. The one drawback: it requires bolting down for maximum stability, so it's not ideal for rental properties.
For a space-saving alternative, the MIKOLO HR05 Half Rack comes in around $350 and includes adjustable J-cups, safety arms, and integrated weight plate storage. Its compact vertical design fits tighter spaces, though it offers less stability than a full power cage.
DIY Squat Rack Ideas for the Practical Lifter
Most articles treat DIY racks as a footnote, a single paragraph warning you to 'be careful.' But a well-engineered DIY rack, built from rated materials, can be every bit as safe as a budget commercial stand for moderate loads. The key is understanding the forces involved and building for them.
The Engineering Reality: What a Rack Actually Holds
Before you cut a single board, understand the load path. A 225 lb barbell resting in J-cups is not a 225 lb static load. When you unrack the bar and squat, you introduce dynamic forces. A controlled rep might add a 1.5x safety factor; a failed rep that drops the bar into the safety arms can spike to 3-4x the static weight (peer-reviewed research). Your DIY structure should be designed for at least 2x your working weight, and ideally 3x.
The Wall-Mounted Stud Rack: The Most Space-Efficient Option
If you have a garage, basement, or reinforced utility room with exposed studs, you can build a stable rack that takes up zero floor space. The principle is simple: transfer the load directly into the structural framing of your house.
What you need:
- Two vertical 2x6 or 2x8 studs, spaced 48 inches apart (standard stud spacing) or wider if your framing allows.
- Two heavy-duty J-cups rated for at least 1,000 lbs each (available from REP Fitness or Titan Fitness for about $25-$40 per pair).
- Four 3/8-inch or 1/2-inch grade 8 bolts, each at least 4 inches long, with matching washers and locking nuts.
- A torque wrench.
The build:
- Locate the studs with a stud finder and verify they are load-bearing and free of plumbing or electrical lines.
- Mark the J-cup height. For a squat, the bar should rest at about mid-sternum height, typically 48-52 inches from the floor for most lifters. For bench press, mark a second set at about 32-36 inches.
- Drill through the J-cup mounting holes and into the center of the stud. Use a level to ensure both sides are identical.
- Bolt the J-cups directly through the drywall and into the stud. Torque to spec.
- Test with an empty bar, then with 50% of your working weight, before going heavy.
The trade-off: This setup transfers all force into your wall framing. That is fine for a single-story garage with 2x6 studs, but it is a poor choice for a second-story room or a wall that shares a living space, the vibration and noise will travel. It also permanently alters your wall, so it is not an option for renters.
The Sawhorse Solution: For Rack Pulls and Pin Squats Only
A pair of heavy-duty steel sawhorses rated for construction loads can serve as a makeshift rack for partial-range movements. Look for units rated at 1,000 lbs or more per pair, such as the ToughBuilt C700 or the Werner 4-foot aluminum model.
What works: Rack pulls (barbell deadlifts from an elevated starting position) and pin squats (squats starting from the bottom position). In both cases, the bar is never dropped from height, it is set down under control.
What absolutely does not work: Standard back squats. The sawhorse crossbars are not designed to hold a loaded bar at shoulder height while you walk out and squat. The lateral forces from unracking will twist the frame, and a failure means the bar rolls off a narrow support. Do not attempt this.
The build:
- Set the sawhorses parallel, spaced about 24 inches apart (narrower than a standard rack's 48-inch width).
- Place a 2x4 or 2x6 board across the sawhorse tops to create a flat surface for the bar to rest on.
- Load the bar and perform rack pulls or pin squats only.
The Wooden Box Squat Stand: A Zero-Skill Alternative
If you cannot bolt into walls and do not trust sawhorses, the simplest safe DIY option is not a rack at all, it is a pair of sturdy wooden boxes for box squats, a legitimate squat variation where you sit back onto a box and stand back up.
What you need:
- Two identical heavy-duty wooden crates or boxes, each rated for at least 500 lbs. Look for reinforced plywood crates with internal bracing, not flimsy storage bins.
- A tape measure to verify both boxes are exactly the same height.
The method:
- Place the boxes side by side, about shoulder-width apart.
- Position a barbell on the floor in front of you. Clean it to your shoulders (or use a landmine setup if cleaning is not an option).
- Squat down until your glutes touch the boxes, pause, and drive back up.
The boxes provide a defined depth target and a safe failure point, if you cannot stand up, you simply sit down fully and dump the bar forward. This is a zero-cost, zero-skill alternative that builds real squat strength.
The Zero-Budget Option: Sandbag Squats
If your budget is literally zero, skip the barbell entirely. A heavy sandbag, a duffel bag filled with 100-150 lbs of play sand (about $5 per 50 lb bag at a home improvement store), can be squatted in a front-rack or bear-hug position. Sandbag squats force your core to stabilize constantly, and the shifting weight mimics a heavy barbell. This is not a replacement for barbell back squats, but it is a legitimate, safe, and free way to build leg strength when no rack exists.
The method:
- Fill a heavy-duty duffel bag with sand, leaving about 20% air so the bag can shift.
- Lift the bag to your chest and hold it in a bear hug.
- Squat to parallel and stand back up. That is one rep.
This approach builds real strength, requires zero equipment beyond a bag and sand, and can be done anywhere, including a second-floor apartment with no noise complaints.
How to Squat Safely Without a Rack
Training without a rack is not a compromise, it is a skill. Lifters trained this way for decades before power racks existed, and the techniques below remain legitimate, safe methods for building squat strength at home with zero rack investment.
The Clean and Front Squat: The Complete Rack Replacement
This is the single most effective rack-free squat method. You clean the barbell from the floor to your front shoulders, then squat. No J-cups, no uprights, no spotter arms, just you and the bar.
Why it works: The clean forces you to generate explosive power from the floor, and the front squat position reduces lower back shear compared to a back squat. You also develop grip, shoulder, and wrist mobility as a byproduct.
The setup:
- Load the barbell with bumper plates, these are mandatory, not optional. Iron plates will not survive a drop from shoulder height.
- Stand with your feet under the bar, grip slightly wider than shoulder-width, and pull the bar from the floor with a deadlift motion.
- As the bar reaches your hips, shrug, pull yourself under it, and rotate your elbows forward so the bar rests on your front delts. Your upper arms should be parallel to the floor.
- Stand up, brace, and squat.
The progression: If you cannot clean your working squat weight, build your clean up separately. A common pattern is to clean a weight you can front squat for 5 reps, then add weight in 5-10 lb increments each week. Most lifters find their front squat is about 80-85% of their back squat, so you are not losing much strength by switching.
The bail: If you fail a front squat rep, you have two options. The first is to push the bar forward and let it fall in front of you, this is safe with bumper plates on a suitable floor. The second is to simply sit down and let the bar roll off your shoulders. Practice both with an empty bar until they are automatic.
The Zercher Squat: The Zero-Clean Alternative
If cleaning is not in your skill set, the Zercher squat lets you pick the bar up from the floor and squat without ever bringing it to your shoulders. The bar rests in the crooks of your elbows, held against your chest.
The setup:
- Load the bar on the floor with bumper plates.
- Sit down in front of the bar, bend your knees, and hook your elbows under the bar. The bar should sit in the elbow crease, not on your forearms.
- Clasp your hands together in front of your chest to lock the bar in place.
- Drive through your heels and stand up. The bar will be held in front of your torso at about solar plexus height.
- Squat to parallel and stand back up.
The trade-off: The Zercher position is genuinely uncomfortable at first. The bar presses into your elbows and upper arms, and you need significant thoracic mobility to keep your chest up. Most lifters find it takes 3-4 sessions before the position feels tolerable. Start with an empty bar and add weight slowly, 10-20 lb jumps per session until you find your working range.
The bail: The Zercher bail is simple: if you cannot stand up, sit down and let the bar rest on your thighs, then roll it forward onto the floor. You never have to worry about the bar falling behind you.
The Floor Press and Pin Squat: Partial Range Alternatives
If you want to train the squat pattern without any overhead position at all, pin squats and floor presses offer partial-range work that still builds strength.
Pin squats are performed by setting the safety pins in a rack at the bottom position of your squat, typically just below parallel. You start from the pins, stand up, and lower the bar back to the pins. This eliminates the eccentric phase and the walkout, so you can train the concentric (standing up) portion with less total system stress. Without a rack, you can approximate this by squatting onto a box or bench set at the correct height, pausing, and driving up.
Floor presses are a bench press variation where you lie on the floor and press the bar from a dead stop at chest level. They do not build leg strength, but they are a legitimate rack-free alternative for upper body pressing that pairs well with Zercher or front squats.
The Squat Bail: The Skill That Keeps You Safe
Every rack-free squat technique ultimately relies on your ability to fail safely. The squat bail is the most important skill you will learn.
The back squat bail (for when you do have a bar on your back):
- The moment you know you cannot complete the rep, do not fight it. Push the bar backward off your shoulders.
- Let it fall behind you. With bumper plates, it will bounce harmlessly.
- Step forward out of the way immediately.
The rules:
- Bumper plates are mandatory. Iron plates will dent, crack, or shatter on impact.
- The floor must be suitable, rubber gym mats or a deadlift platform, never bare concrete or hardwood.
- Practice the bail with an empty bar at least 10 times before you attempt it with weight. The motion must be automatic.
The Rack-Free Weekly Template
Here is a simple template to structure your rack-free squat training:
| Day | Exercise | Sets x Reps | Notes |
|---|---|---|---|
| Day 1 | Clean + Front Squat | 5 x 5 | Focus on clean technique first |
| Day 2 | Zercher Squat | 4 x 6 | Start light, build tolerance |
| Day 3 | Box Squat (no bar) | 3 x 10 | Use a sandbag or dumbbells |
This template hits the squat pattern three times per week with different stimuli, explosive, maximal, and endurance, and requires nothing more than a barbell, bumper plates, and a box.
As noted by strength training safety resources from the National Strength and Conditioning Association, practicing failure scenarios with light loads before attempting heavy lifts is the single most effective way to build safe training habits.
Making Your Final Choice
Choosing among squat rack alternatives comes down to three factors: your current strength level, your available space, and your budget.
If you're lifting under 300 lbs and have limited space, independent squat stands or a compact half rack will serve you well. If you're pushing toward heavier loads and have a dedicated garage or basement, a budget power rack with safety pins is worth the investment. If you're in an apartment or renting, rack-free training eliminates the storage problem entirely.
Here's a simple decision framework:
| Your Situation | Best Choice | Why |
|---|---|---|
| Tight budget, minimal space | Independent squat stands | Lowest cost, portable |
| Moderate space, want safety | Half rack | Safety arms, smaller footprint |
| Dedicated garage gym | Budget power rack | Full safety, expandable |
| Apartment or rental | Rack-free training | No permanent installation |
| Heavy lifter, growing setup | Mid-range power rack | Higher weight capacity, stability |
Whichever route you choose, pair your rack with proper gym flooring. A deadlift platform or thick rubber mats protect both your floor and your equipment, and they reduce noise for neighbors.
Conclusion
The best squat rack alternatives aren't about finding the cheapest cage. They're about matching your equipment to your actual training needs, space constraints, and budget realities. Whether you opt for a compact half rack, a DIY project, or rack-free training techniques, the most important factor is consistency: the best setup is the one you'll actually use several times per week.
At Body Fuel Fury, we stock durable gym equipment alongside performance supplements and training apparel, all at value-driven prices with a fast, user-friendly shopping experience. Our team has years of industry experience helping lifters build the home gym that fits their space and their goals. Get started with Body Fuel Fury and outfit your training space with gear that works as hard as you do.
Frequently Asked Questions
What is the best budget squat rack for home use?
For most home gyms, the REP Fitness PR-1100 Power Rack is a strong budget pick at around $349.99, offering a 700 lb weight capacity and a compact footprint. If you have limited floor space, the MIKOLO HR05 Half Rack at roughly $350.00 provides adjustable J-cups and safety arms with a smaller footprint. Both options give you essential safety features without the cost of a full commercial cage.
Are squat stands safer than power cages for home use?
Power cages are generally safer than squat stands because they include safety pins or spotter arms that catch the barbell if you fail a rep. Squat stands lack that rear and side protection, so you must use proper bailing technique. If you train alone, a power rack or half rack with safety arms is the safer choice for heavy squats.
How to squat safely without a rack?
The safest way to squat without a rack is to use the goblet squat with a dumbbell or kettlebell, which you can easily ditch if needed. For barbell work, consider the front squat with a clean, or the Zercher squat, both of which allow you to bail forward safely. Always practice failing with an unloaded bar first to build confidence in your technique.
Do I really need a full power rack for a home gym?
You only need a full power rack if you plan to do heavy back squats, bench presses, or other lifts where you might get trapped under the bar. If your training focuses on lighter weights, dumbbells, kettlebells, or bodyweight exercises, a pair of squat stands or a half rack is enough. Assess your heaviest lifts and training style before deciding.
Frequently Asked Questions
Q: What is the best budget squat rack for home use?
A: For most home gyms, the REP Fitness PR-1100 Power Rack is a strong budget pick at around $349.99, offering a 700 lb weight capacity and a compact footprint. If you have limited floor space, the MIKOLO HR05 Half Rack at roughly $350.00 provides adjustable J-cups and safety arms with a smaller footprint. Both options give you essential safety features without the cost of a full commercial cage.
Q: Are squat stands safer than power cages for home use?
A: Power cages are generally safer than squat stands because they include safety pins or spotter arms that catch the barbell if you fail a rep. Squat stands lack that rear and side protection, so you must use proper bailing technique. If you train alone, a power rack or half rack with safety arms is the safer choice for heavy squats.
Q: How to squat safely without a rack?
A: The safest way to squat without a rack is to use the goblet squat with a dumbbell or kettlebell, which you can easily ditch if needed. For barbell work, consider the front squat with a clean, or the Zercher squat, both of which allow you to bail forward safely. Always practice failing with an unloaded bar first to build confidence in your technique.
Q: Do I really need a full power rack for a home gym?
A: You only need a full power rack if you plan to do heavy back squats, bench presses, or other lifts where you might get trapped under the bar. If your training focuses on lighter weights, dumbbells, kettlebells, or bodyweight exercises, a pair of squat stands or a half rack is enough. Assess your heaviest lifts and training style before deciding.