 how-to
How to Organize a Home Gym in a Garage: Step-by-Step
Table of Contents
- Assess Your Space and Plan Your Garage Gym Layout Ideas
- Choose the Right Garage Gym Storage Ideas for Your Equipment
- Install Garage Gym Flooring and Protective Mats
- Small Garage Gym Ideas: Maximize Limited Space
- Organize Weights, Barbells, and Accessories Step-by-Step
- Set Up Mirrors, Ventilation, and Lighting
- Maintain and Reset Your Garage Gym Regularly
- Frequently Asked Questions
Last Updated: October 9, 2026
Assess Your Space and Plan Your Garage Gym Layout Ideas
Before you buy a single piece of equipment, learn how to organize a home gym in a garage by measuring your space and creating a realistic plan.
Start by taking honest inventory of what you have. Do you share the garage with a car? Is there a workbench or storage you need to keep?
At Body Fuel Fury, we recommend spending 20 minutes with a tape measure before you spend any money. This one step prevents costly mistakes.
Measure Floor and Wall Space
How much space do you actually have? Measure your garage length, width, and ceiling height. Write these numbers down.
Next, map out what stays. If your car parks there, subtract that space.
Wall space matters as much as floor space. Measure the length of each wall.
A good rule: keep at least 6 feet of clear floor space for exercises like deadlifts or jump rope.
Account for Clearance and Safety Zones
Equipment needs breathing room. A barbell loaded with weight requires space on all sides. If you're doing overhead presses, you need clearance above. If you're swinging kettlebells, you need space around you.
Here's what we recommend:
- Barbell exercises: 8 feet long, 4 feet wide minimum
- Kettlebell swings: 6-foot radius around your body
- Rope climbs or pull-ups: 2 feet on each side, full ceiling height
- Cardio (rowing, jumping): 6 feet by 6 feet minimum
Safety zones prevent injury. Don't place equipment where you'll trip. Don't put mirrors where sunlight creates glare. Don't store heavy items above head height on unstable shelves.
Choose the Right Garage Gym Storage Ideas for Your Equipment
Storage determines whether your gym stays organized or turns into chaos. The right system keeps equipment accessible and protects it from damage.
There are three main storage approaches: wall-mounted systems, vertical shelving, and floor-based organization. Most gyms use all three.
Wall-Mounted Racks and Shelving Units
Wall-mounted racks are the backbone of garage gym storage ideas. They hold barbells, weight plates, and pull-up bars.
Types of wall-mounted systems:
- Barbell racks: Hold 2-4 barbells vertically or horizontally
- Plate storage: Specialized pegs or holders for weight plates
- Dumbbell racks: Tiered stands that hold 10-20 dumbbells
- Pull-up bars: Mounted in doorways or on studs
- Peg board walls: Flexible systems with adjustable hooks
Before you install anything, locate your wall studs. Use a stud finder. Mount racks directly into studs, not drywall. Drywall alone cannot hold heavy weight safely.
For a typical home gym, plan for 8-12 feet of wall-mounted storage. This holds a barbell, weight plates, and basic accessories.
Storage Bins, Baskets, and Vertical Organization
Not everything goes on the wall. Small items need homes. Resistance bands, jump ropes, foam rollers, and straps belong in bins or baskets.
Clear plastic bins work best. You can see what's inside without opening them. Label each bin with what it contains.
Stack bins vertically on shelves to save floor space. A 5-shelf unit in the corner holds 20+ bins of accessories. This keeps your floor clear and your equipment organized.
Install Garage Gym Flooring and Protective Mats
Garage floors are concrete. Concrete cracks under heavy weight. It's also hard on your joints and loud when you drop equipment. Flooring protects both.
Flooring Options and Installation
Rubber flooring is the standard for garage gyms. It absorbs impact, reduces noise, and protects concrete. Interlocking rubber tiles are easiest to install. You don't need tools or adhesive.
Coverage depends on your budget:
- Full coverage (entire workout area): 200-400 square feet for most garages
- Partial coverage (lifting zone only): 100-150 square feet
- Spot coverage (under equipment): 50-100 square feet
Rubber mats cost less than full flooring. They work for small gyms or tight budgets. Place them under barbells, dumbbells, and cardio equipment.
Installation takes 1-2 hours. Sweep the concrete first. Lay tiles in rows. Interlocking edges hold them together. Done.
Protecting Your Garage from Moisture and Climate
Concrete absorbs moisture. This damages equipment and causes rust. Humidity also makes your gym uncomfortable.
Check your garage for water damage or dampness. If water pools during rain, you have a drainage problem.
Options for moisture control:
- Dehumidifier: Pulls moisture from the air
- Ventilation fan: Moves air and dries the space
- Sealant: Protects concrete from water absorption
- Raised storage: Keeps equipment off the floor
A small dehumidifier costs less than replacing rusted equipment. It's worth the investment.
Temperature matters too. Garages get hot in summer and cold in winter. Extreme temperatures make rubber brittle and metal contracts.
Small Garage Gym Ideas: Maximize Limited Space
Not everyone has a 400-square-foot garage. Some people have 200 square feet. Some have less. Small spaces require smart choices.
The key is choosing multi-use equipment and being ruthless about what you keep.
Multi-Use Equipment and Compact Alternatives
A barbell does dozens of exercises. A bench does hundreds. Dumbbells work for strength, cardio, and mobility. These are your core tools.
Skip single-purpose equipment. A leg press machine takes up space and does one thing. Dumbbells take up a corner and do everything.
Compact alternatives:
- Resistance bands instead of cable machines
- Suspension trainer instead of machines
- Adjustable dumbbells instead of full dumbbell sets
- Kettlebells instead of barbells (if space is tight)
- Pull-up bar instead of lat machine
A small garage gym with dumbbells, a barbell, a bench, and resistance bands outperforms most home setups. You don't need more.
Shared Garage and Seasonal Storage Solutions
If you share your garage with a car or tools, plan accordingly. You need a system that lets you move equipment quickly.
Wall-mounted storage is essential here. Everything lives on walls. Your floor stays clear for the car or other uses.
Create zones:
- Equipment zone: One wall for racks and storage
- Parking zone: Space for your car or tools
- Seasonal zone: Corner for off-season items
For seasonal storage, use the upper shelves or overhead racks. Off-season equipment (sleds, outdoor gear) goes up high. Your active equipment stays at eye level.
Organize Weights, Barbells, and Accessories Step-by-Step
This is where most people lose control. Equipment spreads everywhere. Plates end up in different corners. Bands tangle in a pile. A system prevents this.
Creating a Logical Workflow for Daily Setup
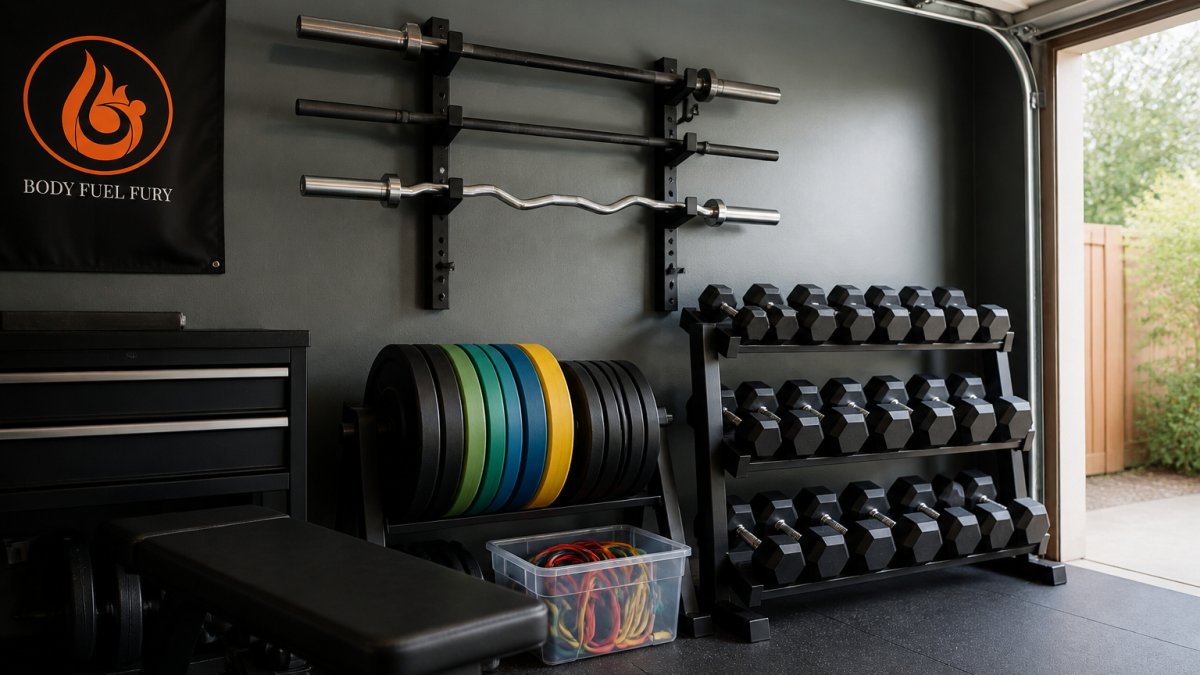
Here's the step-by-step process we recommend:
-
Designate zones. Your barbell zone. Your dumbbell zone. Your accessory zone. Each has its own home.
-
Mount barbells first. Install horizontal racks for barbells. They should be at chest height for easy access. Don't stack them vertically unless you have limited wall space.
-
Organize weight plates by size. Larger plates on the outside, smaller plates inside. This makes loading bars faster. It also looks cleaner.
-
Store dumbbells in order. If you have a dumbbell rack, arrange them lightest to heaviest. If you're stacking them, keep pairs together.
-
Create an accessory station. One shelf or bin for bands, straps, collars, and small items. Everything in one place.
-
Label everything. Use tape and a marker. "Bands," "Collars," "Straps." This takes 10 minutes and saves hours of searching.
-
Keep frequently used items at eye level. Bands, pull-up bar, jump rope. Things you use daily should be within arm's reach.
-
Store heavy items low. Weight plates belong on the bottom shelf or floor. Lighter items go higher up.
This workflow takes 2-3 hours to set up once. After that, it takes 5 minutes to reset after each workout.
Safety, Load Limits, and Secure Installation
Weight is heavy. Racks fail. People get hurt. Don't skip this part.
Every rack has a weight limit. Check it before you buy.
Installation matters. Drywall alone cannot hold weight. You must anchor into studs.
Bolts matter too. Use bolts rated for the weight you're storing. A cheap bolt fails under load.
Here's the safety checklist:
- Find studs with a stud finder
- Use bolts rated for your weight
- Install racks level (use a level)
- Test the rack with light weight first
- Inspect bolts monthly
- Don't exceed the manufacturer's limit
A barbell falling from a wall-mounted rack can cause serious injury. Take installation seriously.
Set Up Mirrors, Ventilation, and Lighting
These details matter more than people think. A dark, humid garage gym feels like a basement.
Mirrors let you check your form. Position them where you can see your side profile during lifts.
Ventilation keeps the space breathable. A simple box fan in a window moves air.
Lighting should be bright and even. LED shop lights are cheap and effective.
These upgrades take 2-3 hours and cost under 200 dollars.
Maintain and Reset Your Garage Gym Regularly
A gym that's organized today becomes chaos in two weeks without maintenance.
Set a weekly reset routine:
- Return all equipment to its home
- Wipe down barbells and dumbbells
- Check that racks are secure
- Sweep the floor
- Organize bins and shelves
This takes 15 minutes. Do it every Sunday. Your gym stays organized forever.
Monthly, do a deeper check:
- Inspect bolts and racks for wear
- Check for rust or damage
- Reorganize if needed
- Replace any broken equipment
A well-maintained garage gym lasts decades. Neglected gyms fall apart in months.
Building a garage gym is one of the smartest fitness decisions you can make.
Start with your measurements. Choose your storage system. Install flooring.
Frequently Asked Questions
What's the best way to organize a garage gym for both beginners and experienced lifters?
Start by measuring your available floor and wall space, then prioritize accessibility. Store frequently used equipment at eye level and within arm's reach. Heavier items like weight plates belong on lower shelves or stands to prevent strain and accidents. Organize by equipment type: barbells together, dumbbells in ascending order, and accessories like resistance bands and foam rollers in labeled bins. This system works whether you're just starting out or training seriously, the key is choosing storage that matches your actual workout routine, not what you think you should be doing.
How do I protect my garage gym from moisture and temperature changes?
Moisture and temperature swings are common in garages and can damage equipment. Install rubber flooring or gym mats to create a moisture barrier between concrete and your workout space. Ensure your garage has basic ventilation by keeping a window or door slightly open during workouts, or install a simple exhaust fan if humidity is high. Store metal equipment like barbells and weight plates in a dry area, and consider a dehumidifier if your garage stays damp. Wipe down metal equipment periodically to prevent rust. These steps protect your investment and keep your space safe for training.
What equipment is essential for a small garage gym?
For a small space, choose multi-functional equipment that delivers results without taking up room. Adjustable dumbbells, a pull-up bar, resistance bands, and a yoga mat cover most fitness goals. Add a bench if you have the space. Skip bulky machines and single-use items. Vertical storage, wall-mounted racks and shelves, frees up floor space so your small garage gym feels open and functional. Focus on equipment that matches your actual fitness goals, not what looks impressive. Many people see better results from consistent training with simple tools than from a crowded garage full of equipment they rarely use.
How should I organize my garage gym if I share the space with vehicles or storage?
Divide your garage into zones: a dedicated workout area, a vehicle parking section, and general storage. Use wall-mounted racks and shelves to keep equipment off the floor and out of the way. Store less-used items on higher shelves or in the back. Keep your clear floor area for workouts free of obstacles, and use a mat to define the boundary of your gym space. If you train seasonally, consider collapsible storage solutions or equipment that doubles as furniture. Label everything so household members know where items belong, and establish a quick reset routine before and after each workout.